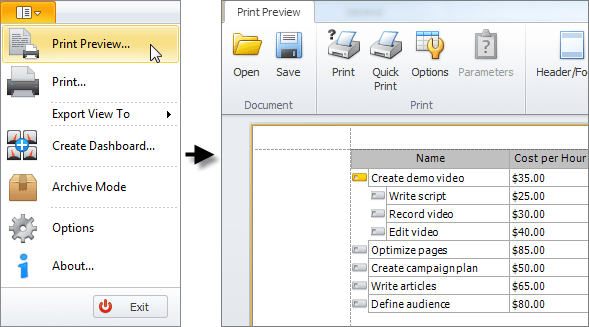
How to Print views
You can preview and print any view in CentriQS.
- Click Application Menu, and then click Print Preview.
Tip Learn how to set layout and how to set filters to print the view with required layout and data.
You can use the Print Preview commands that are grouped into the following categories:
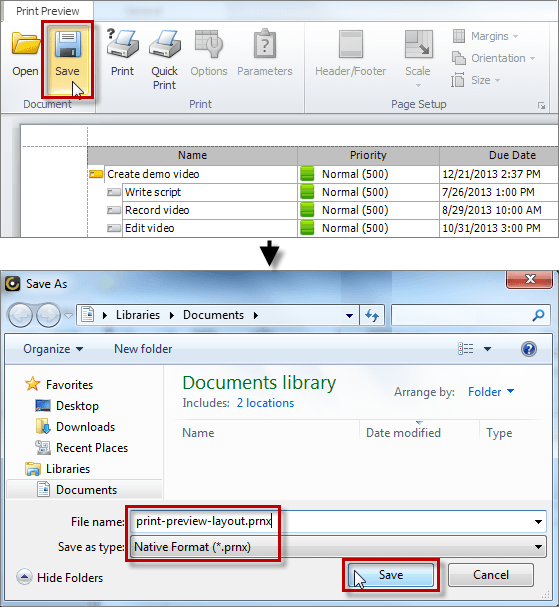
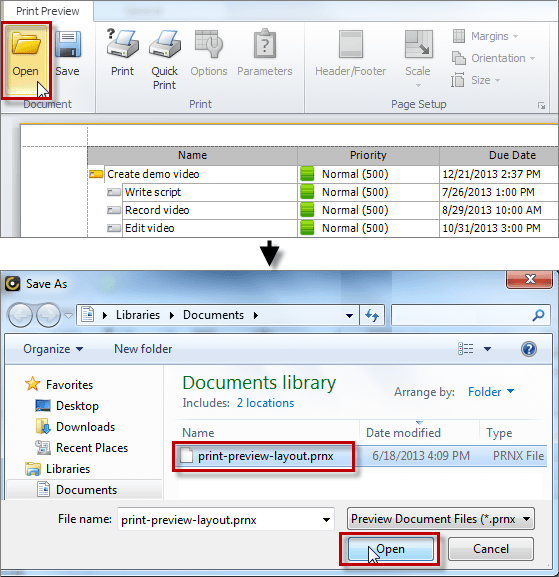
1. Document
- To save layout settings of the document in the Native Format (*prnx), on the ribbon, in the Document group, click Save; in the Save As dialog box, type the name in the File name box, and then click Save.
- To load layout settings that you saved, on the ribbon, in the Document group, click Open; in the Open dialog box, browse to the required *.prnx file, click it, and then click Open.
2. Print
- To print the whole document by default printer device, on the ribbon, in the Print group, click Quick Print.
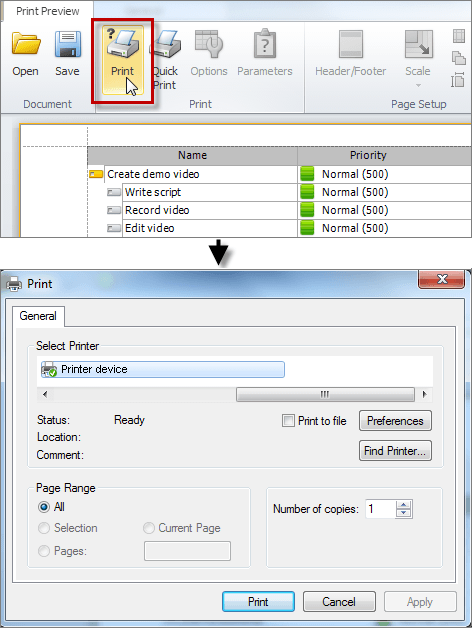
- To select required printer device, specify page range and number of copies before printing, on the ribbon, in the Print group, click Print.
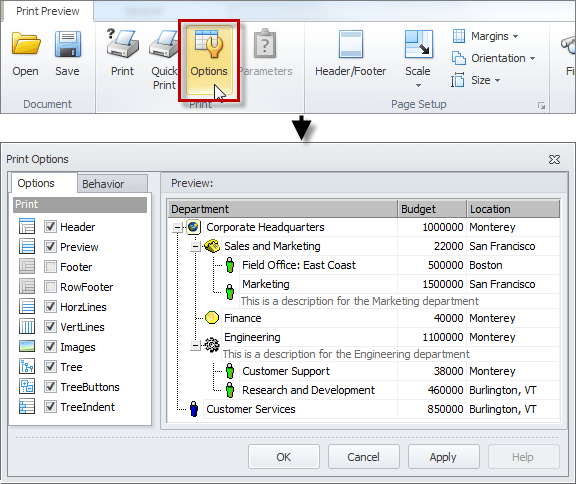
- To select print options and behavior, on the ribbon, in the Print group, click Options.
Examples
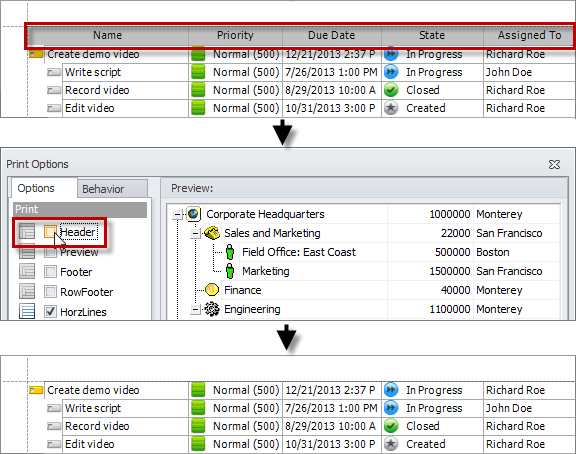
If you clear the Header check box, the column headers of your document will be hidden.
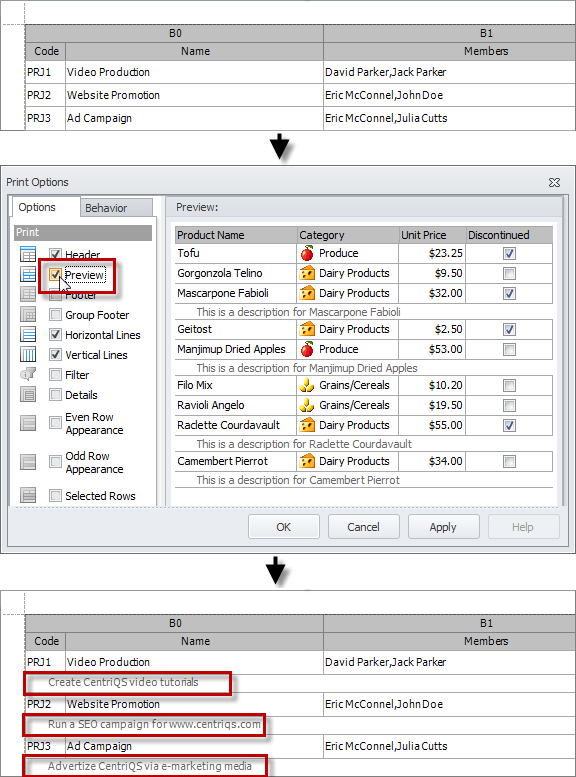
If you select the Preview check box, the notes will be shown under each record that has a note.
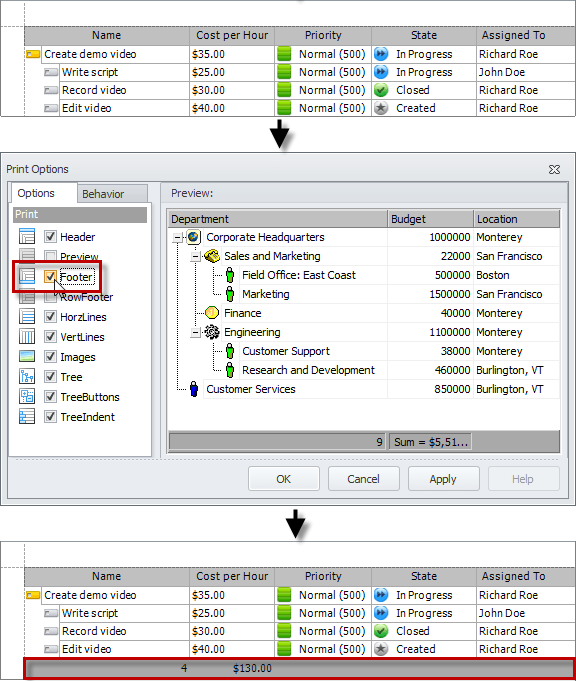
If you select the Footer check box, the columns footer will be shown at the bottom.
 -
-
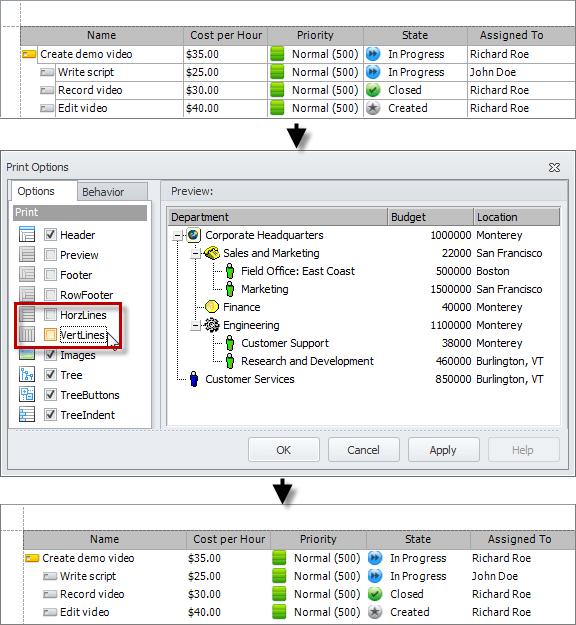
If you clear the HorzLines and VertLines check boxes, the document table will hide horizontal and vertical lines of columns and rows.
3. Page Setup
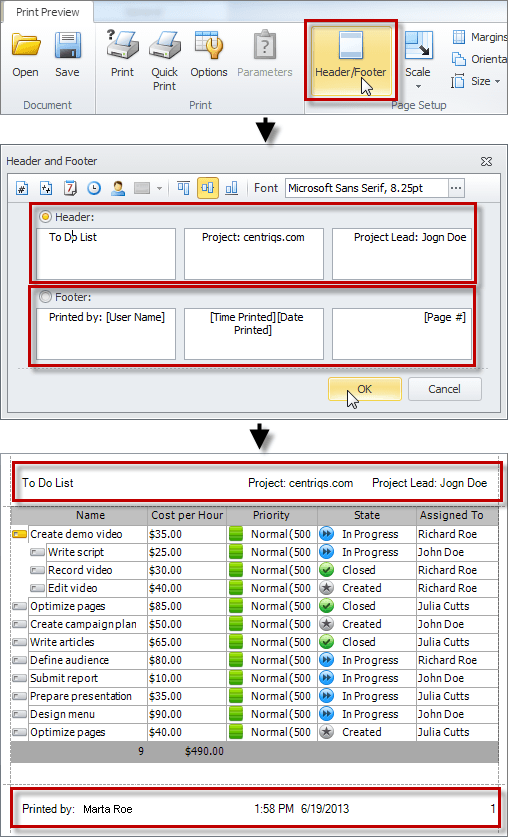
- To add information to the document header and footer, on the ribbon, in the Page Setup group, click Header/Footer.
Note Both the header and the footer areas are divided into three sections that can show such information as Page Number, Date Printed, Time Printed, User Name, or custom text. In the Header and Footer dialog box, you can also select Alignment and Font.
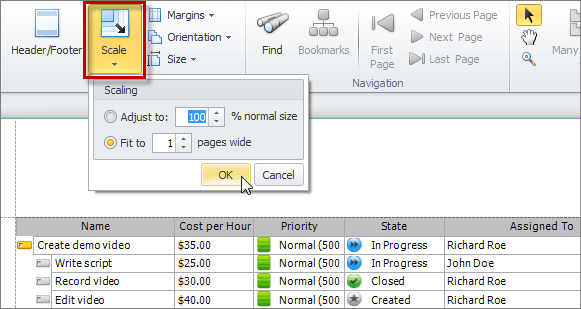
- To set the document scale, on the ribbon, in the Page Setup group, click Scale, and then click Adjust to N% normal size or Fit to N pages wide.
- To change the margins of the document, on the ribbon, in the Page Setup group, click Normal, Narrow, Moderate, or Wide in the Margins list.
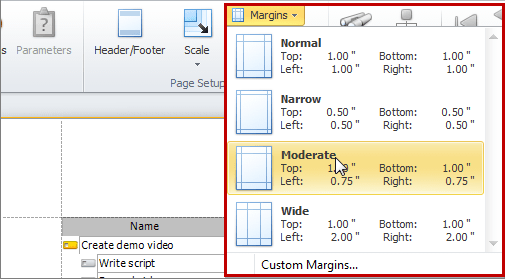
Tip You can also drag the margins to required position to set custom margins.

- To choose the Landscape or Portrait orientation, on the ribbon, in the Page Setup group, click Orientation, and then click required orientation.

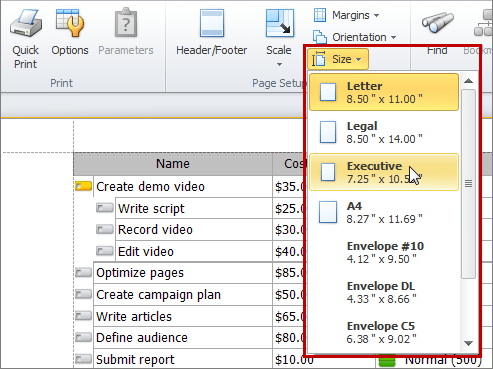
- To set the document size, on the ribbon, in the Page Setup group, click Size, and then click required size.
4. Navigation
- To search for a word or phrase in the document, on the ribbon, in the Navigation group, click Find; in the Find dialog box, type required text in the Find what box, and then click Find Next.

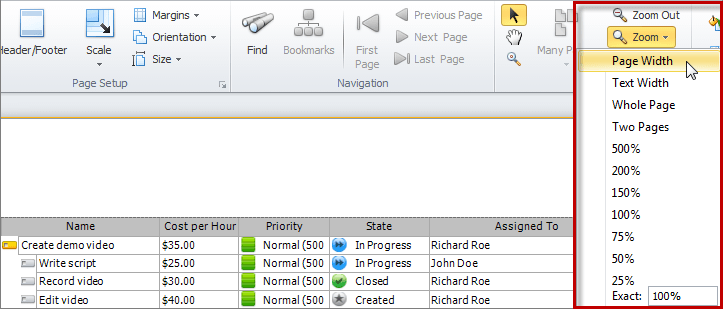
5. Zoom
To change the document scale, on the ribbon, in the Zoom group, click Zoom In, Zoom Out, or Zoom.
6. Page Background
- To change the background color of the document, on the ribbon, in the Page Background group, click Page Color, and then click the color you want.

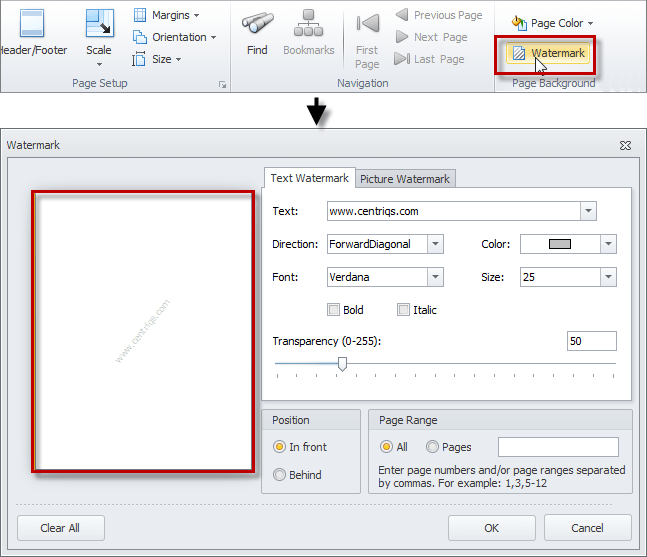
- To add a text or image watermark to the document, on the ribbon, in the Page Background group, click Watermark, and then enter required settings in the Watermark dialog box.
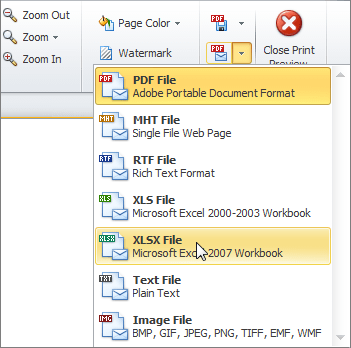
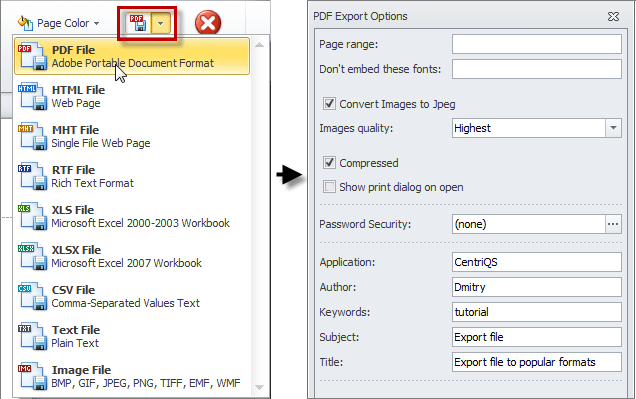
7. Export
- To export the document to an available file format, on the ribbon, in the Export group, click Export To, and then click the file format you want.
- To export the document to an available file format and send the file by email, on the ribbon, in the Export group, click Email As, and then click the file format you want.